Wednesday, June 17, 2015

Kids home for summer


It is finally summer break for my kids and they couldn’t be more excited.  Hannah is going to a horseback riding camp for a week and Liam is playing soccer this summer.  Needless to say it is going to be a fun filled and busy summer.  Although the kids have arranged activities already, I want to make sure we spend lots of time together and make summer memories.


Ever since Liam and Hannah were little I loved planning fun activities, this summer won’t be an exception.  I have mastered how to keep them entertained so they are not complaining they are bored every 5 minutes.  Plan, plan, plan, is the key to success; it is the only way to make sure they are having fun, staying active and not sitting on the couch watching cartoons.

The last week of school was exciting for them because they were looking forward to summer break.  I saw this great idea on Pinterest to have them make a list of all the things they want to do over the summer.  It is a good way to “accomplish” fun new things and keep them looking forward to something.

Here is our list of fun activities Liam and Hannah came up with so far, I am sure they will want to add to it as the summer goes on.

1. Bake cookies and make ice cream sandwiches out of them
2. Have a water party in the backyard with the sprinklers
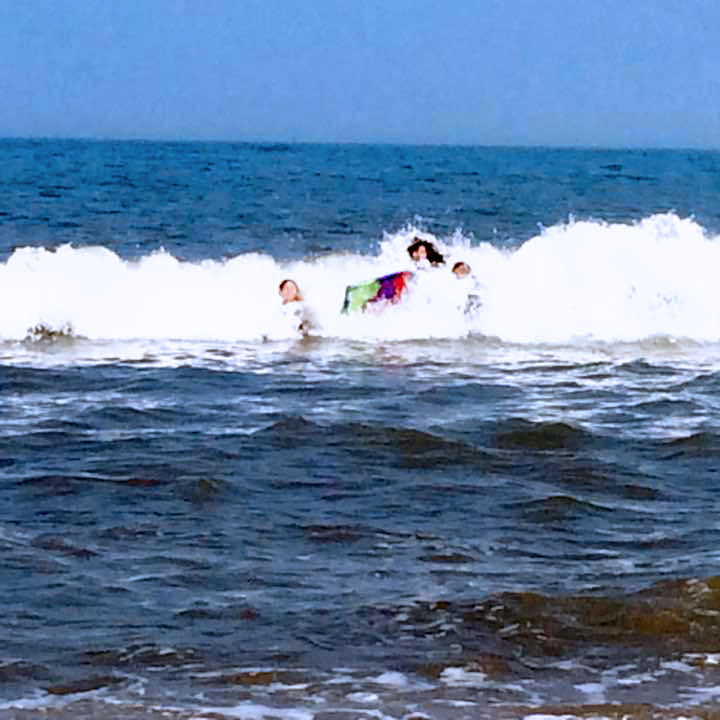
3. Visit the beach
4. Make a cardboard box fort
5. Go berry picking
6. Have a picnic

7. Go canoeing
8. Go camping
9. Have a campfire and make s’mores
10. Make homemade pizza
11. Set up a lemonade stand
12. Have a water balloon fight
13. Go on a bike ride

14. Help mom plant the garden
15. Visit a museum
16. Go stargazing
17. Play mini-golf, Guys vs. Girls
18. Go to an amusement park or water park
19. Paint rocks to make paperweights
20. Go roller blading
21. Visit the zoo
22. Catch fireflies
23. Have a movie night outside
24. Watch fireworks on the 4th of July
25. Make a giant slip and slide
26. My tie dye shirts and socks
Having the kids make a list of fun things they want to do makes it easier on when planning activities; they are already “kid approved.”  It is going to be a great summer.  :)


What do you like to do with your kids over the summer? How do you keep them from the inevitable “I’m bored” stage?

Go Green and Stay Keen,

Julie

Tuesday, June 09, 2015

Teach Recycling from the beginning

Ever since I was young my parents taught me how important it is to recycle and take care of our planet.  I believe that all parents want to leave the world a better place for their children after they are gone.  As my children grew up and learned about trash and where it goes, they also knew about recycling.


My husband and I made leaning about recycling fun for our kids.  We made it more of a game and made it easy for them to understand and put to use.  The earlier good habits are ingrained, the easier it is to make an impact.

When we were teaching our children about recycling we used some of these steps.

1. We talked about what recycling means and respecting and helping the earth.

2. There are many books about the basics of reducing, reusing, and recycling.  It is a great way to start of teaching your kids.  It excited my children to start recycling after reading.

3. To help them understand what was recyclable and what was not, we decorated bins to correlate what goes in them.

4. We had a “recycled item of the week” that we focused on to make it a fun event.  Each week we kept adding to the list until we had a full list.

5. We made a fun facts list to post on the fridge about facts about recycling. For example; the average person throws away about 170 lbs. of food waste every year that is the same as 1,077 banana peels.

6. We visited our local recycling center to see how the process actually works.  Our kids loved it when they were young.  Usually recycling centers will help organize a visit with a group.  It is a great way for them to understand the process.

7. To reuse our own “nice trash” we made little craft projects.  Kids love crafts and what a great way to learn about recycling too.  I found some good recycling craft ideas here.

8. To teach them about conserving water, we set a “shower song.” It was a song that they got to shower to that gave them a time limit so they did not waste water.  We always made it one of their favorite songs so they knew when it was going to be done.  It was fairly easy for them to grasp the concept of conserving water, they understand that if they used too much water, the fish wouldn’t have any place to live.

9. To teach our children about reusing we also had them go through their closets and toys to find five items to donate to local panties and organizations.  It was a great way to help the community and teach them about reusing and making a difference.

10. There are countless games online that revolve on the subject of recycling and conservation.  Our favorite websites were Kids Recycling Zone and Kids Recycle.


My husband and I strive to inspire our children to love the earth and take care of it.  It is easy to feel like we don’t have much control about what happens to our earth in years to come; but it is beneficial to teach our little ones now to ensure there will be a healthy planet for future generations.  I believe the earlier good habits are created, the easier it is to incorporate them into daily life.

Go Green and Stay Keen,

Julie

Monday, June 01, 2015

Kids Cook Monday

I have been slacking about posting my Kids Cook Monday Meals.


We have been keeping up with it and participating since my first post.  My mind just goes to other topics when I sit down to write.  I have had way too many other good topics to share with you guys :)

Good news is I remembered tonight! My kids and husband helped cook dinner tonight! It was so wonderful.

We made Confetti Stuffed Bell Peppers and Chilled Chocolate and Peanut Butter Cookies for desert.

We had so much fun cooking and our meal tasted delicious.  I think we spent the entire time cooking, laughing at Liam, he had a comment for everything; silly kid!

Here are the recipes that we used!

We actually found the Confetti Stuffed Bell Pepper recipe at the Kids Cook Monday website.

Confetti Stuffed Bell Peppers

Ingredients-

4 large bell peppers, cut in half lengthwise and seeded
1 bag (12 oz.) frozen mixed vegetables, cooked according to the package directions
1 bag (10 oz.) whole grain brown rice, cooked according to package directions
1 cup shredded mozzarella cheese
½ cup parmesan cheese
1 can tomato sauce
1/8 tsp. black pepper

Instructions-

Preheat oven to 350 degrees F
Lightly grease a 9x13-inch shallow baking dish with nonstick cooking spray
Combine mixed vegetables, brown rice, ½ cup mozzarella cheese, ¼ cup parmesan cheese, tomato sauce and black pepper in a large bowl.
Arrange peppers in prepared pan and spoon mixture into peppers.
Pour ¼ cup water into pan around the peppers. Cover with aluminum foil and bake for 30 minutes, until peppers are tender.
Remove foil and evenly sprinkle peppers with remaining cheeses.  Bake uncovered 5 minutes or until cheese is melted.
Enjoy!


For dessert we made no-bake, Chilled Chocolate-Peanut Butter Cookies


Ingredients-

2/3 cup sweetened flaked coconut
¼ cup honey
¼ cup light corn syrup
1/3 cup creamy peanut butter
¼ cup chocolate chips
2 tbsp. unsweetened cocoa
3 cups corn flakes, lightly crushed

Instructions-

Line a large baking sheet with parchment paper.
On a small skillet add cocoanut and toast for about 3 minutes then let cool.
In a medium sauce pan combine honey, corn syrup, and peanut butter on medium heat.  Keep stirring until mixture begins to bubble.  Remove from heat and stir in chocolate chips and cocoa.  Stir the mixture until the chocolate chips have melted and then add the cereal and toasted coconut and stir until coated.
Spoon balls of mixture on to parchment paper and refrigerate until hardened, about 15 minutes.
Enjoy!


It ended up being a fantastic kid’s cook Monday!  We were so full after our meal we went on a walk around the neighborhood to digest it all.  The meal and the walk put the kids right to bed.  When we got back they sat on the couch for 15 minutes and went straight to bed.  Great end to a great evening.
Go Green and Staying Keen,

Julie

Friday, May 22, 2015

Best time of the year for Rhubarb

Rhubarb is one of my favorite vegetables that is seasonally spring.  It is so delicious and makes, in my opinion, THE BEST desserts.  Don’t get me wrong, I like to add rhubarb to main courses, but it doesn’t get much better than a good old fashioned rhubarb pie.  I wanted to share my love for this seasonally sweet vegetable with a few of my recipes.  I hope they seem just as delicious to you as they do to me!

Rhubarb Crumble
rhubarb crumble julie green and keenIngredients-
1 ½ pound of rhubarb, just into small slices
2 cups of raspberries or strawberries (or if you are feeling crazy, both)
1 ¼ cup sugar
2 tablespoons of instant tapioca
½ tsp. grated orange zest
2 tbsp. fresh orange juice
A dash of salt

Ingredients for topping-
6 tbsp. softened vegetarian butter
¼ cup packed light-brown sugar
¼ tsp. orange zest
1 cup flour
Dash of salt

Instructions for topping-
Mix butter, brown sugar, orange zest in a large bowl, electric mixers work great.  Mix until creamy.  Add flour and salt, work mixture until it forms coarse crumbs.

Instructions for Rhubarb-
Preheat oven to 375 degrees F.
Mix rhubarb, berries, sugar, tapioca, orange zest, orange juice, and salt in a large bowl.
Divide rhubarb mixture into six small, one cup baking dishes and top with topping.
Bake for about 30-35 minutes until golden brown and it is bubbling a little bit.
Let cool and serve, Enjoy!


My favorite Rhubarb Cake
rhubarb cake julie green and keenIngredients-
½ cup vegetarian butter
1 ½ white sugar
¼ cup soy yogurt
1 tsp. vanilla extract
2 cups flour
1 tsp. bake soda
¼ tsp. salt
1 cup buttermilk
2 cups chopped rhubarb
1 tbsp. flour
¼ cup vegetarian butter
2 tsp. ground cinnamon
1 cup packed brown sugar

Instructions-
Preheat oven to 350 degrees F
In a large bowl, mix together butter, sugar, yogurt and vanilla until creamy.
In another bowl sift 2 cups of flour, baking soda, and salt.  Add the buttermilk and combine with creamed mixture.
Toss the rhubarb with 1 tbsp. flour and stir into the batter.  Pour the batter into a buttered 9 x 13 in pan and smooth the surface.
In a separate bowl, blend together ¼ cup butter, cinnamon, and brown sugar.  Sprinkle evenly over the batter.
Bake for 45 minutes, let cool and enjoy!


The Beloved Fresh Rhubarb Pie
rhubarb pie julie green and keenIngredients-
4 cups of chopped rhubarb
1 1/3 cups white sugar
6 tbsp. flour
1 tbsp. butter
Pie Crust (Homemade or bought, your choice)

Instructions-
Preheat oven to 450 degrees F
Combine sugar and flour and sprinkle a ¼ of it over the pie crust.  Heap the rhubarb over this mixture and sprinkle the remaining sugar and flour over the top of the rhubarb.  Chop up pieces of butter and sprinkle over the top and cover with top crust.
Bake for 15 minutes then reduce the heat to 350 degrees F and continue baking for 40-45 minutes.
Enjoy your fresh rhubarb pie!


Go Green and Stay Keen,

Julie

Wednesday, April 29, 2015

Animal Milk vs. Plant Milk

Walking through the grocery store it is hard not to miss the milk section.  With countless varieties including animal milk, plant milk, nut milk, soy milk, and grain milk; how do you know what to choose and what is the best for your family. 

I have always been lactose intolerant so I have drank plant based milks since I was a child.  With all the recent hype about antibiotics and pesticides that are said to be in animal milk, many people are turning to alternatives.  Milk substitutes are often consumed by people with intolerants, people concerned with the environment, vegetarians, and vegans. 

I have never known anything but plant based milks and have always had an interest in the various types.  Here are a few plant based milks I consume and their pros and cons.

  • Almond milk is a safe milk option for people with food allergies or a lactose intolerance like me.  It does not contain any dairy, lactose, soy, eggs, cholesterol, gluten, MSG, or whey (milk proteins).


Almond milk has less protein than traditional dairy milk, one cup of almond milk has 1 gram of protein and one cup of dairy milk has 8 grams.  When I drink almond milk I make sure that I am getting protein from other sources in my diet.

Over all Almond milk is very healthy.  It is heart-healthy, low calorie, nutrient dense dairy milk alternative.  

  • Soy milk is my favorite non-dairy alternative.  It has the best source of protein compared to other substitutes.  It has about 7 grams of protein and has a similar fat content to dairy milk.  Most of the fat in soy milk is unsaturated, providing the body with healthy fats.


It is the milk is produced by soaking soybeans and grinding them with water.

It is a good alternative to dairy milk.  The only concern I have is that many soybeans that are grown today are genetically modified.  I make sure to read the labels and buy soy milk that is organic and “non-GMO.”

  • I don’t often use Hemp milk, but it is also another alternative.  Hemp seeds are high in plant based omega-3 fatty acids which help keep cholesterol and blood pressure under control.  It also has 10 essential amino acids making it a good source of protein. 


I like hemp milk in smoothies because it has a thick and creamy texture.  It also has a little bit of a nutty flavor that is really delicious in banana smoothies.

If you are looking to switch to a plant based milk for health reasons it is important to read the ingredients and understand the products nutritional value.  Many substitutes can be high in sugar and have little to no difference in their nutritional values.  I drink plant milks because of my intolerance and because I am a vegetarian.  If you are thin thinking about switching for environmental reasons, know that you will not have a lack of nutrients.  

Thursday, April 23, 2015

Expanding the Herb Garden

With spring right around the corner I have been feeling pretty ambitious.  Over the past year my cute little herb garden has turned into somewhat of a little jungle.  When I started growing it last year I had no idea how quickly it would grow or how much it would yield.  I was really surprised how my green thumb has developed, I haven’t killed any herbs and they are growing like crazy. 


My family secretly loves when I cook with our fresh herbs…they usually don’t know but they always have seconds.  J  I decided yesterday because of how much of a hit my garden is, I should expand it and plant some new herbs.  I had no intention of making it larger or planting more when I first started but our family loves it and I like being able to share it with friends.


Yesterday I started planning out how I am going to make it larger and what herbs I want to attempt to grow.  Expanding my outdoor herb garden took more time planning than I thought it would.  I had to figure out if I could transplant and move herbs so they have enough room to grow and to see which way I could expand the garden without hitting any power lines.  I felt like an architect or something like that.


This morning I went to the hardware store to pick up some new garden stones and some healthy black soil for my expansion project.  I was motivated to start moving stones and building up the walls…then I tried moving the ones that have been in the ground for a year; it wasn’t happening.  I decided I needed my husband’s muscles to help. 

In the mean time until he gets home, I have be looking up other herbs to plant in the garden.  I already have a healthy growing amount of mint, chives, parsley, basil, sage, and thyme.  The mint plant is probably one of my favorites; I love mixing it in drinks and when I am cooking vegetables.  I guess I can’t really say it is my favorite, I love all the herbs I have planted. J

I think I want to add some rosemary to use with olive oil and cheeses, tarragon to cook with rice and tofu, and cilantro to add to sandwiches and guacamole.  Adding these three should be enough herbs for me now.  I don’t want to go over board and create an even larger jungle. 
Since planting my herb garden I have used so many more fresh herbs while cooking.  It is so convenient to just walk outside and find an entire garden full of flavors.  I can’t wait until my expansion project is done and I have even more herbs.


Go Green and Stay Keen, 

Julie

Subscribe